Find a Drayton stockist near you
Documents
Installation Guides
User Guides
Specifications
- Part number
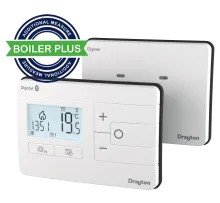
- RF902 Digistat Dual-Channel RF; RF90D Digistat Dual-channel Receiver Spare; RF90T Digistat RF Thermostat Spare
- Power supply
- Digistat: 2 X AA 1.5V alkaline batteries; Receiver: 230VAC +/-10%, 50Hz
- Switch type and rating
- Digistat: N/A; Receiver: 3(1)A 230V/50Hz
- Min. recommended current
- Digistat: N/A; Receiver: SPDT 10mA@24VAC (inductive)
- Ambient temperature
- Digistat: Operating 0°C to 40°C Storage - 20°C to 65°C; Receiver: Operating 0°C to 45°C Storage - 20°C to 65°C
- Ambient humidity (non condensing)
- Operating 20% to 80% 90% non condensing
- Temperature setting range
- 5°C to 30°C
- Rated impulse voltage
- 4KV
- Ball pressure test
- 75°C
- Disconnection means
- 1B
- Automatic action
- Digistat: N/A; Receiver: 100,000 cycles
- Operating frequency (Bluetooth)
- Digistat: 2402-2480 MHz; Receiver: N/A
- Max RF Power transmitted (Bluetooth)
- Digistat: +10dBm; Receiver: N/A
- Pollution degree
- 2
- Protection level
- IP30
- Radio frequency
- 433.92 MHz
- Radio signal range
- 50m typically The range may be affected by the composition / density and number of walls between the thermostat and receiver
- Wiring
- Designed for fixed wiring only, to comply with IET wiring regulations
- Dimensions
- Digistat: 90x135x31mm (HxWxD); Receiver: 94x122x31mm (HxWxD)
- Energy Class
- Digistat: N/A; Receiver: IV = 2%
- Relevant EC directives
- 2014/53/EU Radio Equipment Directive 2012/19/EU WEEE 2011/65/EU RoHS Directive
- Applied standards
- EN60730-1 EN 60730-2-7 EN 60730-2-9 ESTI EN 300 328 ESTI EN 301 489 EN IEC 63000 EN15500
- App system requirements
- Android™ Version 9 or higher | Apple® iOS 12 or higher | Bluetooth version 4.2 or higher
- Sustainable offer status
- Green Premium Product
Videos
Digistat - Meet the universal Bluetooth thermostat
Digistat - How to install the Drayton Digistat
Digistat - how to set up the new Digistat , programming, adding devices & installer options
Digistat - how to use the Drayton Digistat and master app controlled heating
Digistat Dual-Channel RF RF902 Reset Procedure
Digistat Dual-Channel RF RF902 Commissioning
FAQs
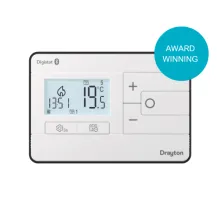
The Digistat is universal because it can be used as a fully-programmable thermostat or as a simple manual thermostat. In fact it contains 4 types of functionality:
| 7-day programming | The most flexible option allowing you to schedule every day of the week independently. |
| 5-day / 2-day programming | This groups weekdays and the weekend separately, so you can set a schedule for your weekdays and a separate schedule for the weekend. |
| 24-hour programming | This gives you the same schedule across every day of the week. |
| Manual thermostat | This option has no schedule and controls by temperature only. You set your preferred temperature and adjust it with the + and - buttons. |
The Wiser Heat app makes scheduling and adjustments easier, quicker and simpler. The app is completely intuitive and allows you to copy schedules from one day to the next. All from the smartphone in the palm of your hand.
Please note that using the app will lock out the buttons on the Digistat while the app is open. A lock symbol will appear top left. To go back to using the buttons on the Digistat please close all open apps.
No, your smartphone connects directly to the Digistat using Bluetooth (4.2 or later) technology, providing a quick and simple connection when in range (typically at home). A broadband router is not needed. However your smartphone will need a mobile data connection to open and use the app.
Digistat supports the following fuel types:
| 22900B | Gas, oil, heat pump |
| 2290M | Gas, oil, heat pump, electric |
| RF901 | Gas, oil, heat pump |
| RF902 | Gas, oil, heat pump |
Depending on the fuel type you select during installation will affect how Digistat works with your boiler/heat source - so ensure to select the correct type during installation.
Yes, there is a Digistat to suit both types of boiler – try our product selector to find the right one for you.
The Digistat now has a BOOST function. You access this via the O button, selecting the time for the BOOST (30 mins, 1 hour, 2 hours or 3 hours) and the temperature required. When the BOOST has elapsed the Digistat returns to its normal schedule.
The Digistat remembers the last BOOST so if you always use the same parameters just press the O button once. Simple!
When a boost is selected, a timer symbol appears in the bottom right of the display and remains until the next event.
Note that a boost can also be used as a temporary setback while you are out. Just select 15°C for up to 3 hours to avoid heating your home while you are out. If this is your last boost, just one press on the O button will setback the heating for the time chosen previously.
The Digistat includes 3 preset schedules to get you started:
Preset 1 provides heating in the morning and in the evening
Preset 2 provides heating in the morning, at noon and in the evening
Preset 3 provides heating all day long
The thermostat can be set to manual mode (temperature only)
The + and – buttons are recessed
When pressing the + and – buttons and tone sounds above and below the set point when audible feedback is enabled.
Yes, go into the Advanced User settings and select option 6 (lock). You will be asked to enter a 3-digit code which will need to be entered later to unlock the Digistat.
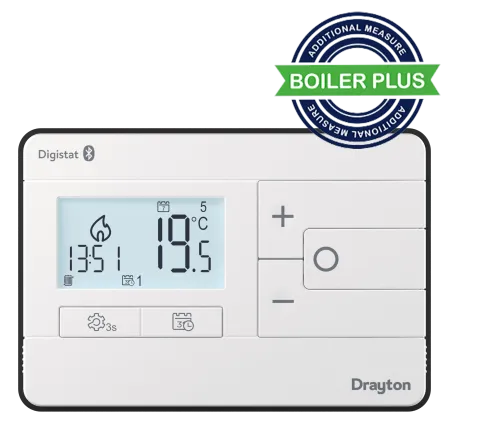
The Digistat qualifies as one of the additional measures required when replacing a boiler. In fact it qualifies both as a Smart Control and as Load Compensation.
| 2290B | Replaces 22192, 22084, 22083, 22102 and 22104 |
| 2290M | Replaces 22103, 22088, 22087, 22103 and 22105 |
| RF901 | Replaces RF710, RF700, RF701, RF703 and RF704 |
| RF902 | Replaces 22190, 22090, 22092, 22111 and 22110 |
A real-time clock means that you don’t need to set the time or date when you first use your Digistat – it is factory set during manufacture. In addition you don’t need to worry about summer/winter time changes as this is also done automatically by the Digistat.
As soon as both the Receiver and Thermostat are powered up they will automatically pair.
However this auto-pairing process only lasts 2 minutes (to avoid issues of pairing with the wrong Digistat). If you find that the 2-minute auto-pairing period has expired, please follow the following process:
- Reset the Digistat thermostat by going into the setting menu, selecting the Inst03 menu (installer settings) and then rSEt20 to reset to factory settings. Then remove the batteries.
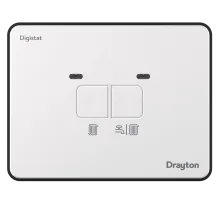
- Reset the Receiver by pressing the button for about 15 seconds until you see a red light followed by flashing orange/green which shows it is in pairing mode.
- Put the batteries back in the thermostat and they will now pair automatically.
To swap between Heating and Hot Water on the thermostat press the setting button (cog symbol) to open this open.
Flashing radiator icon on the display = heating.
Use the + or – buttons to change to hot water (flashing tap icon) and select with the O button.
In either mode the radiator or tap icon will be displayed.
Press and hold the settings (cog symbol) button for 3 seconds to access the setting menu. Then select USEr01 by pressing the O button. Select MOdE and then use the up or down arrows to select AUTO or MAN. Confirm by pressing O. Use the back button (cog symbol) to exit.
Green Premium is the Schneider Electric eco-mark that brings more value to our customers and more growth to our company.
The Green Premium eco-mark stands for complete, transparent, and easily available information about products
Schneider Electric is committed to deliver 75% of its Product Revenue with Green Premium Products.
Our Green Premium eco-mark encompasses a broad range of environmental criteria, meeting and exceeding international regulations and industry standards:
- REACH declaration;
- ROHS compliance declaration;
- PEP a Product Life Cycle Analysis, with carbon footprint assessment;
- EoLI while applicable;
Thanks to comprehensive information about our Green Premium products, our customers can make more sustainable, environmentally conscious decisions
There are a number of reasons why the Bluetooth pop-up does not appear instantly:
- There may be other Digistats powered up and within range and this will slow down the pairing process. If it is possible to depower the other Digistat please do this while you are pairing, or if not then press “I have done these steps” and wait for the RETRY button to appear. On the second attempt the pop-up should appear instantly.
- There are known issues using Bluetooth with some later Apple devices. However the RETRY button should allow you to pair your Digistat within a few attempts.
- There are also known issues when pairing with Samsung smartphones using Android 11. Please change to an earlier or later version of Android.
These settings appear in the installer menu and it is important to select the setting for your heat source: gas boiler (default), oil boiler, heat pump, or electric heating
- When used with a gas boiler the Digistat will automatically cycle the boiler to help your boiler to run more efficiently and save you 10% on your heating bill (compared to a simple ON/OFF thermostat).
- When used with a Heat Pump the Digistat will protect the compressor by reducing cycling to 3 cycles per hour, to improve the life of the compressor.
- When used with an oil boiler the Digistat will allow the boiler to run without cycling for improved efficiency.
- When used with electric heating the Digistat cycles the heater at 12 cycles per hour to maintain room temperature and save money.
Related Products
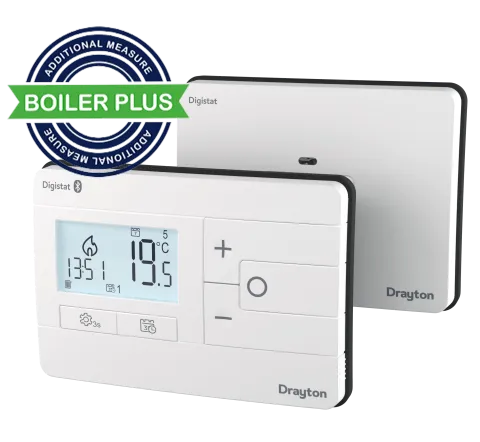
Digistat Single-Channel RF RF901
Digistat Mains 16A Relay 2290M
